
Red velvet brownies are the perfect fusion of the classic red velvet cake and the rich, fudgy texture of traditional brownies. Whether you’re a fan of the signature tangy flavor or simply love indulgent desserts, this guide will walk you through everything you need to know about making the perfect batch of these delicious treats.
In this article, we’ll explore the essential ingredients, step-by-step preparation, expert tips for achieving the perfect texture, and creative variations to keep things exciting. Whether you’re baking for a special occasion like Valentine’s Day or just craving something sweet, these brownies are sure to hit the spot.
Let’s dive right in!
Introduction to Red Velvet Brownies
What Are Red Velvet Brownies?
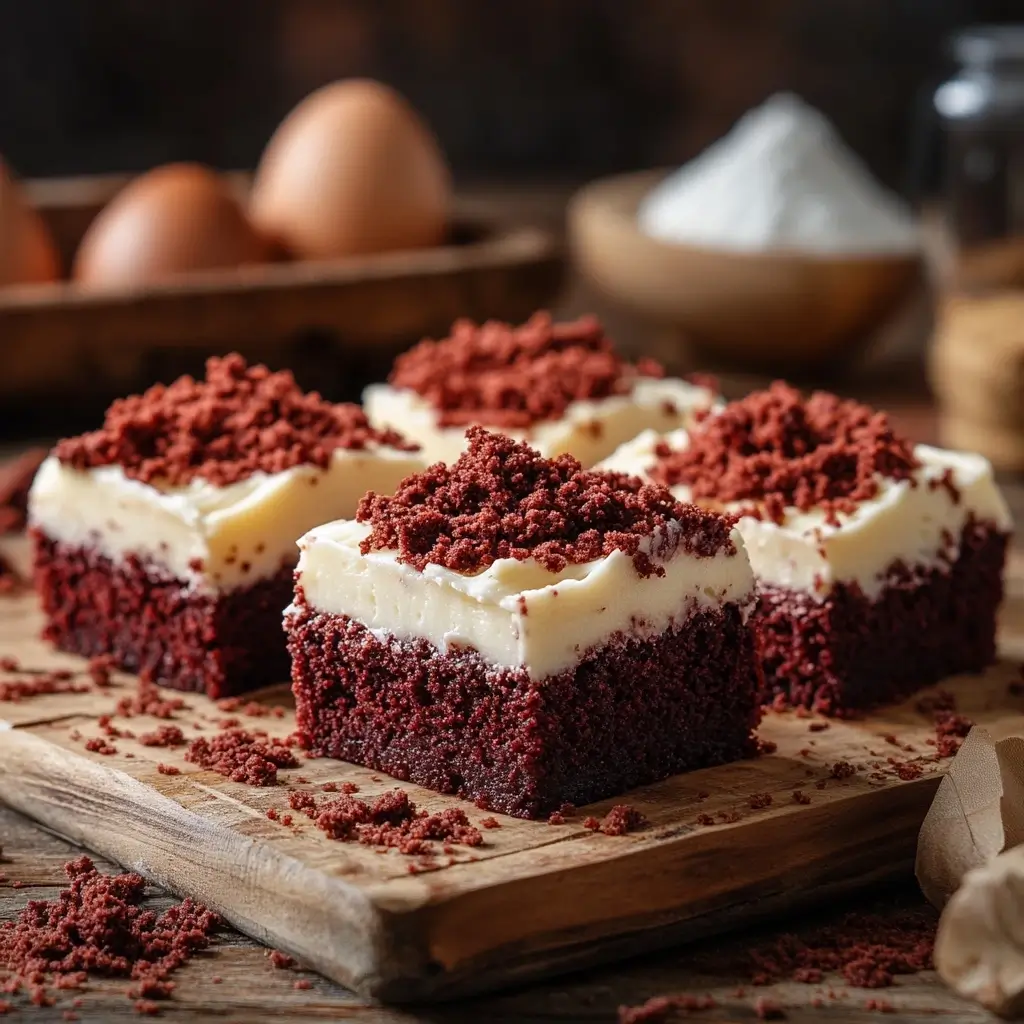
Red velvet brownies are a delightful twist on the traditional brownie, offering the rich chocolatey goodness of a brownie combined with the iconic red velvet flavor. The deep red color, subtle cocoa taste, and slight tang from ingredients like vinegar make them unique. Typically topped with a luscious cream cheese frosting, these brownies strike the perfect balance between sweetness and tanginess.
Unlike regular brownies, which are purely chocolate-based, red velvet brownies have a hint of acidity from ingredients like buttermilk or vinegar, enhancing their signature taste.
The Popularity of Red Velvet Desserts
Red velvet desserts have been a fan favorite for decades, gracing everything from cupcakes to cheesecakes. Their popularity stems from their eye-catching color and unique taste profile—a subtle blend of chocolate and vanilla with a hint of tanginess.
The addition of cream cheese frosting elevates red velvet brownies, making them a staple at celebrations, bake sales, and even as a comforting homemade treat. Whether you’re a baking enthusiast or a newbie in the kitchen, red velvet desserts never fail to impress.
Why You’ll Love Red Velvet Brownies
If you’re torn between choosing a fudgy brownie or a slice of red velvet cake, these brownies offer the best of both worlds! Here’s why you’ll love them:
- Visually stunning: The vibrant red hue makes them a showstopper.
- Deliciously rich: They deliver the perfect mix of chocolatey and tangy flavors.
- Perfect texture: A chewy, fudgy interior with a smooth, creamy frosting on top.
- Great for any occasion: From holiday parties to casual snacking, they fit the bill.
Now that you’re familiar with what makes red velvet brownies so special, let’s move on to the ingredients you’ll need to create these delightful treats.
Ingredients for the Perfect Red Velvet Brownies
Creating the perfect batch of red velvet brownies starts with selecting the right ingredients. Each component plays a crucial role in achieving that signature flavor and fudgy texture. Whether you’re making them for a special event or just satisfying a craving, using high-quality ingredients ensures delicious results.
Essential Ingredients and Their Roles
To make irresistible red velvet brownies, you’ll need a combination of classic brownie ingredients and red velvet essentials. Here’s what you’ll need and why they matter:
- Butter: Provides richness and moisture, resulting in a soft, chewy texture.
- Sugar (white and brown): White sugar sweetens, while brown sugar adds a touch of moisture and depth of flavor.
- Eggs: These help bind the ingredients and contribute to a rich, fudgy consistency.
- Cocoa Powder: A key ingredient that provides a subtle chocolate flavor without overpowering the red velvet taste.
- All-Purpose Flour: The right amount ensures a balance between cakey and fudgy textures.
- Vinegar: This secret ingredient enhances the tangy red velvet flavor and activates the baking soda.
- Red Food Coloring: To achieve the signature red hue, use high-quality gel food coloring.
- Cream Cheese: Used for the topping, it adds a creamy, tangy contrast to the rich brownies.
Choosing the Right Cocoa Powder and Food Coloring
Selecting the best cocoa powder can make a big difference in flavor. Dutch-processed cocoa powder is often preferred because it offers a smoother, less acidic taste compared to natural cocoa. This allows the red color to stand out beautifully without interference from dark cocoa tones.
When it comes to food coloring, gel-based options are the best choice. Unlike liquid food coloring, which can dilute the batter, gel coloring provides a vibrant hue with just a small amount.
Substitutes for Common Ingredients
Need to make substitutions? Here are a few alternatives:
- Replace butter with coconut oil for a dairy-free option.
- Use apple cider vinegar instead of white vinegar for a mild tang.
- Swap regular flour for gluten-free flour to accommodate dietary preferences.
With the right ingredients in hand, you’re ready to start baking these delightful red velvet brownies!
Step-by-Step Recipe Guide
Baking red velvet brownies is a fun and rewarding process that doesn’t require advanced skills. By following a few simple steps, you can achieve the perfect balance of fudginess and vibrant red color.
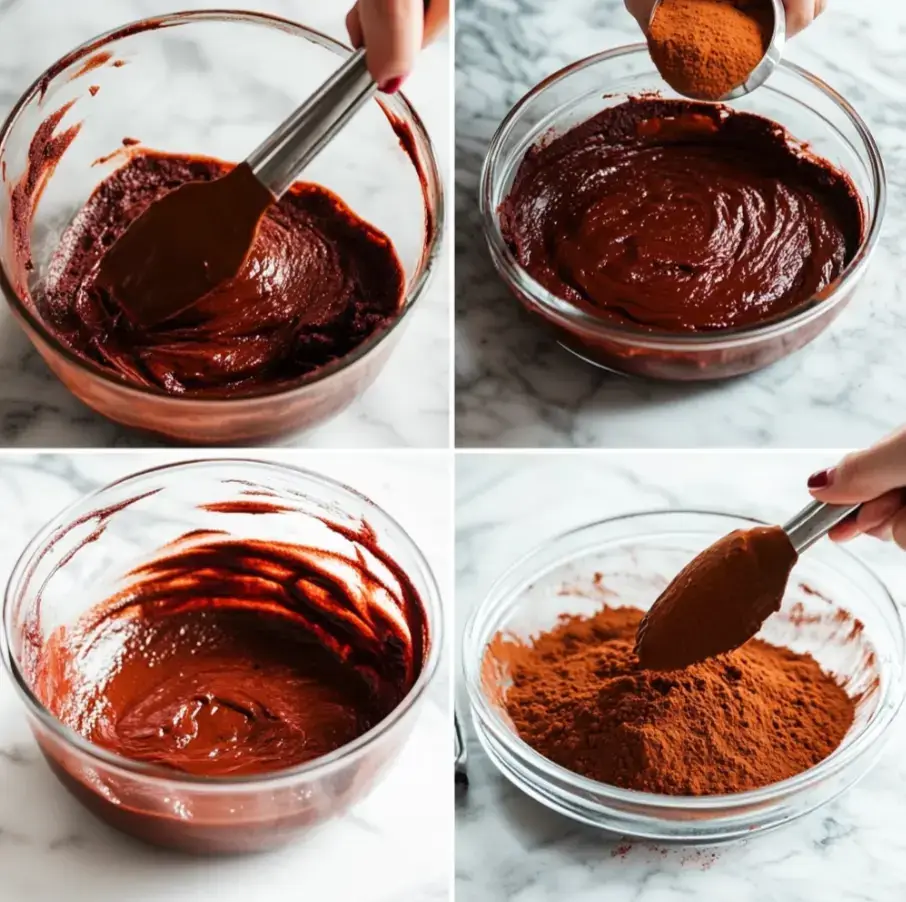
Preparing the Batter: Key Steps
- Melt the Butter: Start by melting the butter in short bursts in the microwave or over low heat on the stove. This creates a smooth base for the batter.
- Mix Sugars and Eggs: In a large mixing bowl, whisk together white and brown sugar with eggs until the mixture becomes slightly frothy. This step helps create a rich texture.
- Add Cocoa and Food Coloring: Gently incorporate cocoa powder and red gel food coloring. Stir until the batter achieves a deep, even red hue.
- Combine Dry Ingredients: Gradually add the flour, cornstarch, and a pinch of salt, folding gently to avoid overmixing.
Adding the Signature Red Velvet Color
The secret to achieving the perfect red color lies in using the right type and quantity of food coloring. Add it slowly, stirring well to ensure even distribution throughout the batter. Remember, the color may darken slightly during baking, so don’t worry if it looks a bit intense at first.
Achieving the Perfect Bake
- Preheat the Oven: Set your oven to 335°F (170°C) and prepare a 9-inch square pan with parchment paper.
- Bake with Care: Pour the batter into the pan and bake for 20-25 minutes. The brownies should have a set top and a slightly gooey center when tested with a toothpick.
- Cooling is Key: Allow the brownies to cool completely before adding frosting to prevent it from melting.
How to Make Cream Cheese Frosting
A smooth and tangy cream cheese frosting pairs perfectly with red velvet brownies. Here’s a quick way to prepare it:
- Beat softened cream cheese and butter together until smooth.
- Gradually add powdered sugar, mixing until fluffy.
- Add a splash of vanilla extract for extra flavor.
- Spread evenly over the cooled brownies before slicing.
For more delicious brownie variations, check out the Ultimate Brookie Recipe for another fun twist on classic desserts.
With these steps, you’ll have decadent and visually stunning red velvet brownies that are ready to impress!
Tips for the Perfect Texture
Achieving the perfect texture for red velvet brownies requires a careful balance of ingredients and baking techniques. Whether you prefer them fudgy, chewy, or slightly cakey, these tips will help you master the art of baking flawless brownies every time.
Balancing Gooey and Cakey Textures
The texture of your red velvet brownies largely depends on the ratio of wet to dry ingredients and how they are mixed. Here are some key tips:
- For fudgy brownies, use more butter and sugar while slightly reducing the flour. This keeps them moist and dense.
- For cakier brownies, increase the flour and beat the eggs a little longer to incorporate air.
- Don’t overmix the batter, as this can lead to a denser, tougher texture instead of a soft, chewy bite.
A simple trick to achieve the best consistency is to bake them until the edges are firm but the center is slightly underdone—it will continue cooking as it cools.
Measuring Ingredients Accurately
Precision is key when it comes to baking red velvet brownies. Small measurement errors can drastically change the final outcome. To ensure consistency:
- Always use a kitchen scale to weigh flour, sugar, and cocoa powder.
- Spoon and level flour into measuring cups instead of scooping to avoid excess.
- Use room temperature eggs and butter for even mixing.
Avoiding Common Baking Mistakes
Even experienced bakers can make mistakes. Here are a few pitfalls to watch out for:
- Overbaking: Remove brownies when a toothpick comes out with moist crumbs, not dry.
- Incorrect oven temperature: Always preheat and consider using an oven thermometer.
- Skipping cooling time: Allow brownies to cool completely before frosting to prevent melting.
For more baking tips, explore our guide on the difference between crème brûlée and custard to understand how ingredients influence texture.
Creative Variations of Red Velvet Brownies
Once you’ve mastered the classic red velvet brownies, why not experiment with exciting variations? Adding creative twists can take these treats to a whole new level.
Red Velvet Cheesecake Brownies
If you love the combination of tangy cream cheese and rich red velvet, cheesecake brownies are a must-try. Simply swirl a layer of sweetened cream cheese into the brownie batter before baking. This creates a marbled effect and adds a creamy contrast to the fudgy texture.
How to Make Them:
- Prepare the brownie batter as usual.
- Mix cream cheese, sugar, and an egg, then dollop over the batter.
- Use a knife to swirl gently before baking.
Adding White Chocolate Chips
For an extra touch of sweetness and texture, white chocolate chips make a great addition to red velvet brownies. They melt slightly while baking, creating pockets of creamy sweetness in every bite.
Tips for Best Results:
- Use high-quality white chocolate chips for a rich flavor.
- Gently fold them into the batter to avoid overmixing.
- Sprinkle a few on top before baking for a decorative touch.
Vegan and Gluten-Free Options
Want to make your brownies suitable for dietary restrictions? Here’s how:
- Substitute eggs with flaxseed or applesauce for a vegan option.
- Use gluten-free flour blends to replace all-purpose flour without compromising texture.
- Opt for plant-based butter and dairy-free cream cheese for frosting.
Experimenting with different flavors and textures keeps things exciting. For more dessert inspiration, check out other delicious recipes at Lively Cuisine.
Serving and Presentation Tips
Once you’ve baked your delicious red velvet brownies, it’s time to serve them in style. Whether you’re preparing them for a party, gifting them to a friend, or simply indulging yourself, a little effort in presentation can make a big impact.
Best Occasions for Red Velvet Brownies
These brownies are perfect for a variety of occasions, thanks to their rich flavor and eye-catching appearance. Some of the best times to serve them include:
- Valentine’s Day: Their signature red color makes them a romantic treat.
- Holidays and celebrations: Whether it’s Christmas or a birthday party, they’re a festive addition.
- Bake sales and potlucks: They’re easy to transport and always a crowd-pleaser.
- Everyday indulgence: Treat yourself to a sweet snack with your afternoon coffee.
Garnishing Ideas
A beautifully garnished brownie can make all the difference. Try these easy yet elegant ideas:
- Cream cheese frosting swirls: Use a piping bag to create decorative patterns on top.
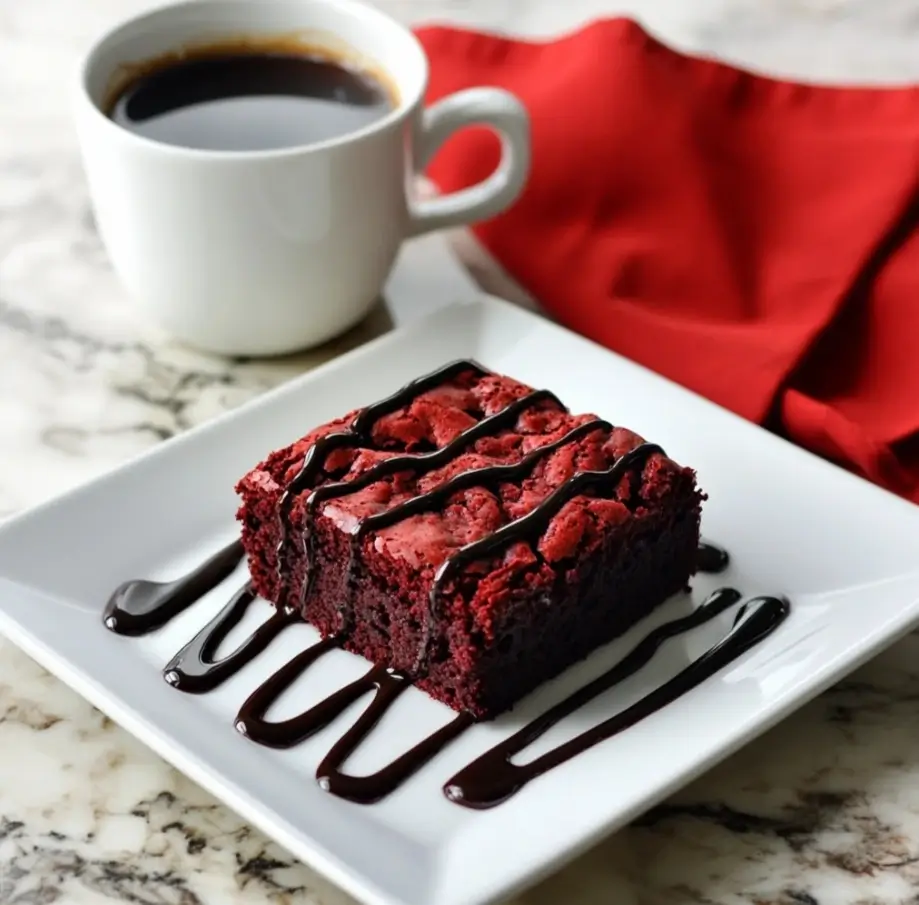
- Chocolate drizzle: Melt white or dark chocolate and drizzle it over the brownies for a gourmet touch.
- Sprinkles or red velvet crumbs: Add a sprinkle of crushed brownie crumbs or festive sprinkles.
- Fresh berries: Raspberries or strawberries add a fresh and colorful contrast.
Pairing Suggestions
Pairing your red velvet brownies with the right drink can elevate the experience. Some tasty options include:
- A hot cup of coffee or espresso.
- A glass of cold milk for a classic combination.
- A scoop of vanilla or cream cheese ice cream for extra indulgence.
Taking the time to serve and present your brownies thoughtfully can make them even more enjoyable!
Storage and Shelf Life
To keep your red velvet brownies fresh and delicious for as long as possible, proper storage is key. Whether you plan to enjoy them over a few days or save them for later, follow these tips to maintain their taste and texture.
Refrigeration vs. Room Temperature
The best way to store your brownies depends on whether they are frosted or plain.
- Unfrosted brownies: Store them in an airtight container at room temperature for up to 3 days.
- Frosted brownies: Since the cream cheese frosting contains dairy, it’s best to refrigerate them in a sealed container for up to 5 days.
If you prefer a softer brownie, allow refrigerated ones to come to room temperature before serving.
Freezing Red Velvet Brownies
If you want to extend their shelf life, freezing is a great option. Follow these simple steps:
- Cut the brownies into individual servings.
- Wrap each piece tightly in plastic wrap or foil.
- Place them in a freezer-safe bag or container.
- Freeze for up to 3 months.
To enjoy, simply thaw the brownies at room temperature for a few hours or warm them slightly in the microwave.
Maintaining Freshness and Flavor
Here are a few extra tips to ensure your red velvet brownies stay fresh and flavorful:
- Keep them in a cool, dry place away from direct sunlight.
- Avoid storing them near strong-smelling foods, as they can absorb odors.
- If they start to dry out, a quick zap in the microwave can revive their fudgy texture.
With the right storage techniques, you can enjoy your brownies anytime!
Frequently Asked Questions
When it comes to making red velvet brownies, several common questions arise. Below are answers to some frequently asked questions to help you achieve the best results every time.
Can I Make Red Velvet Brownies Without Food Coloring?
Yes, you can make red velvet brownies without food coloring, but they won’t have their signature red hue. Instead, they’ll take on a natural cocoa brown color. If you’re looking for a natural alternative, try using beetroot powder or pomegranate juice to achieve a subtle red tint.
How Do I Prevent Dry Brownies?
To keep your brownies moist and fudgy, follow these tips:
- Don’t overbake: Remove them from the oven when a toothpick comes out with a few moist crumbs.
- Measure ingredients correctly: Using too much flour can dry them out.
- Store properly: Keep them in an airtight container to retain moisture.
Can I Use a Box Mix for Red Velvet Brownies?
Absolutely! A box mix can be a great time-saver. However, for a homemade touch, consider adding extra cocoa powder, vanilla extract, or a splash of vinegar to enhance the flavor and authenticity of traditional red velvet brownies.
How Long Do Red Velvet Brownies Last?
At room temperature, unfrosted brownies last about 3 days. Frosted brownies should be stored in the fridge and enjoyed within 5 days. For longer storage, freeze them for up to 3 months and thaw as needed.
Whether you’re new to baking or a seasoned pro, these tips will ensure your red velvet brownies turn out perfectly every time.
Conclusion and Final Thoughts
Baking red velvet brownies is a rewarding experience that brings together the rich flavors of chocolate and the signature tang of red velvet. Whether you’re preparing them for a special occasion or simply to satisfy a craving, these delightful treats are sure to impress.
Throughout this guide, we’ve covered everything from the essential ingredients to storage tips and creative variations. With careful attention to detail and a little practice, you can create fudgy, decadent brownies that everyone will love.
Don’t be afraid to experiment with different flavors and toppings to make the recipe your own. Whether you add white chocolate chips, a cheesecake swirl, or a simple dusting of powdered sugar, the possibilities are endless.
So, gather your ingredients, preheat your oven, and start baking your delicious batch of red velvet brownies today!